|
This blog post contains Amazon Affiliate Links. As an Amazon Associate I earn from qualifying purchases. One of my favorite Citizen Science activities with kids involves ants, so this picture book really appealed to me! Although you may need to take another look at this one in the spring, I wanted to share it now. It would also make a great hook for a study on where insects go in the winter! 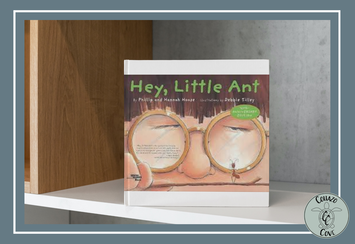 Featured Picture Book:
Hey, Little Ant (1998) By Phillip and Hannah Hoose (@PhillipHoose) Illustrated by Debbie Tilley Summary A boy and an ant have a discussion about whether the boy should step on the ant. They compare aspects of their lives that are similar and different. The final decision is left up to the reader! Related Themes: SEL: Taking the perspective of others Caring about others Peer pressure Similarities and differences Science: Insect studies STEM Ideas: 1. There is a great lesson on Mystery Science that you could tie in after reading this book called Where do bugs go in winter? 2. Here are my lesson slides that incorporate the Mystery Science video and an engineering challenge with Hex Bugs! 3. Engineer a safe trap to bring with you on a picnic so no ants get harmed. Use recyclable materials during the design process! 4. Plan out, write a script, and record a video convincing the boy to save the ant. 5. Create a green screen project (either video or just still photos) where the kids are small like ants. DoInk is my favorite app for these types of projects, but you could use whatever green screen app you like! 6. Bring live ants/ant farm into your classroom for student observations! Here is a great site with ideas and support. Or take your kids out into nature to do some ant observations - make sure you bring the hand lenses and science notebooks! Do you have other ideas? I'd love to hear about them in the comments! #BetterTogether
0 Comments
Whenever I am asked what materials I couldn't live without in the STEM lab, when integrating STEM in the regular classroom, or at home, besides recyclables like cardboard tubes, these are my MUST HAVES!
I've included Amazon links (these are affiliate links), ways I use these materials in my lessons, as well as lots of actual lesson slides. As always feel free to make a copy of the lesson slides and tweak for your needs!
TONS and TONS of masking tape! I always make sure at the very least, each group has its own roll. A management strategy I use is to have students tear off an arm’s length piece and attach it to the edge of their table to they aren’t waiting for the group roll.
You’d be surprised how many kids don’t know how to tear tape. Modeling this fine motor skill and giving them time and grace to practice is important. Of course, scissors can be provided as well. Some of my STEM challenge constraints include only using a certain amount of tape (ie. 30cm). This helps kids think before building/cutting and allows them to develop other ways to attach materials together (ie. making slits in straws, pushing straw ends inside one another, etc.)
Toothpicks, I always use the round type for their strength and pointy ends which are more user-friendly for kids, are used by the box in my lessons!
I like to have plenty of both the bendable and non-bendable type straws on hand! Let the kids decide which will be better for their particular design. There is a lot of failure learning associated with the bendable kind. Allow that failure to happen, even if you see it coming!
Pool noodles make great boundary areas for activities. I tape them down with Painter’s Tape as Start/Finish lines, to make arenas for robotic challenges, and in large squares to delineate each team’s building area. In addition, they can be used in many challenges.
KEVA Planks are one of my favorite STEM materials because of their simplicity and versatility. They are lightweight, identical pieces of smooth polished wood.
I use pipe cleaners as a material choice in almost every engineering design challenge at every grade level. It always amazes me how many primary students have never held, twisted, or otherwise played with a pipe cleaner!
I always keep a huge bag of packing peanuts as part of my STEM materials. The cheapest place I’ve found them is at your local UHAUL rental store, but you can also get them at mailing stores and on Amazon. I use the common white ones a lot, but have also found that the more expensive water-soluble kind are great for various challenges as well.
Everyone’s favorite go-to for STEM challenge materials. You can never have enough, and I usually make sure I have small and large versions for kids to choose from.
STEM materials don't have to be fancy, electronic, or expensive. These are definitely 8 I wouldn't want to do without! If you have any questions about any of the suggestions or lesson slide links, please don't hesitate to reach out!
I'd love it if you would add your MUST HAVES in the comments! |
Kim CollazoSTEM Advocate and Picture Book Author Archives
April 2024
Categories
All
|

 RSS Feed
Proudly powered by Weebly